 Pin It
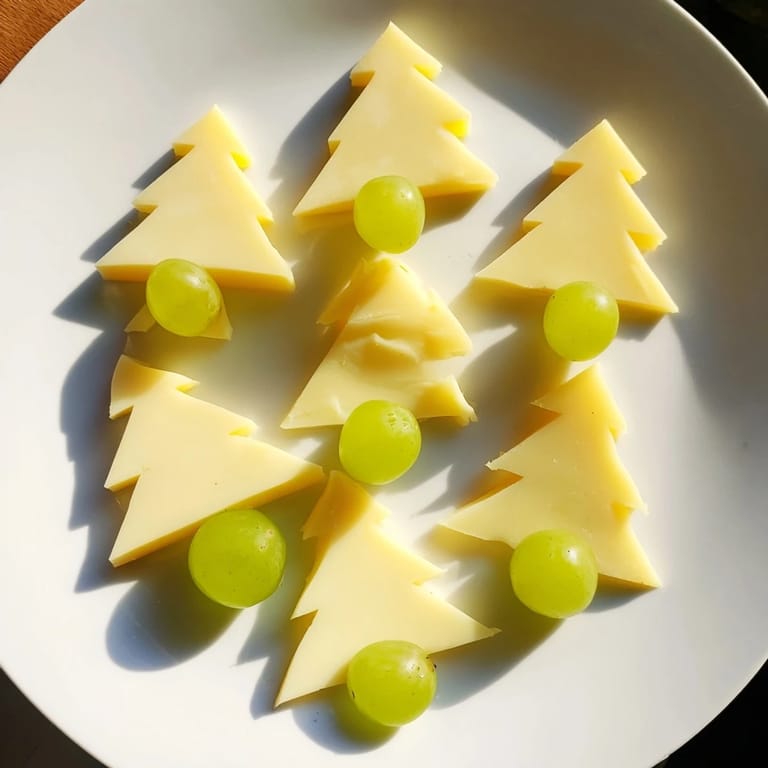
 I'll never forget the Christmas Eve when my sister challenged me to make our cheese board look like something from a fancy magazine spread. I was arranging blocks of cheese when inspiration struck—what if I sliced them into little triangles and arranged them like a forest of tiny pine trees around the border? My guests that evening couldn't believe how a few simple cuts and some green grapes transformed an ordinary board into something that felt almost magical. That's when I realized the best holiday magic happens when you combine simple ingredients with a little creativity and intention.
I made this for a small New Year's gathering last winter, and it became the conversation starter of the evening. Everyone was so taken by the presentation that they actually asked me how to do it themselves—something that rarely happens with food. That's when I understood that sometimes the most memorable dishes aren't about complicated techniques, but about seeing familiar ingredients through a fresh lens.
Ingredients
- Semi-firm cheese (Gouda, Edam, or Emmental): The chilling is absolutely crucial here—warm cheese won't hold a clean triangular shape when you slice it. I learned this the hard way after my first attempt turned into messy shards. Use about 250 grams, and make sure it's been in the fridge for at least an hour before you start slicing. The firm texture is what gives you those beautiful, defined pine tree points.
- Small green seedless grapes: These need to be completely dry or they'll slip around as you arrange them. I pat mine with paper towels immediately before building the border. Around 150 grams is perfect for filling the gaps and creating that forest effect. The small size matters—they nestle perfectly between the cheese triangles.
Tired of Takeout? 🥡
Get 10 meals you can make faster than delivery arrives. Seriously.
One email. No spam. Unsubscribe anytime.
Instructions
- Chill your canvas:
- Get your cutting board and serving platter ready while your cheese sits in the coldest part of your fridge. A cold cheese is a happy cheese—it slices cleanly without crumbling or tearing.
- Create your pine trees:
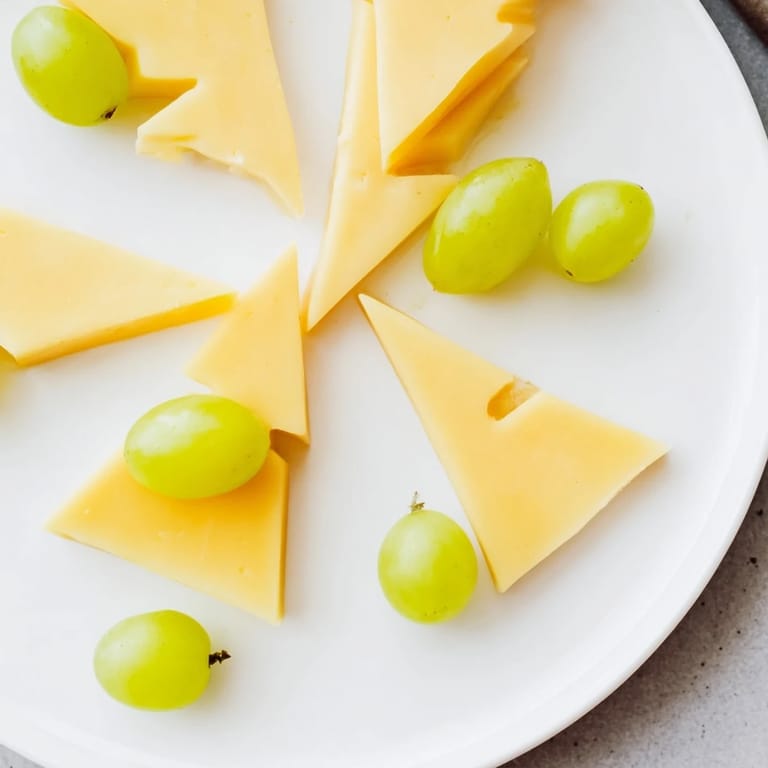
- Using a sharp chef's knife, slice the cheese into thin triangles about 5 to 6 centimeters long, with a 1-centimeter wide base. Think of each slice as a little tree shape. The knife should glide through cold cheese like butter; if you're struggling, your cheese needs more chilling time. You want roughly 40 to 50 triangles depending on your board size.
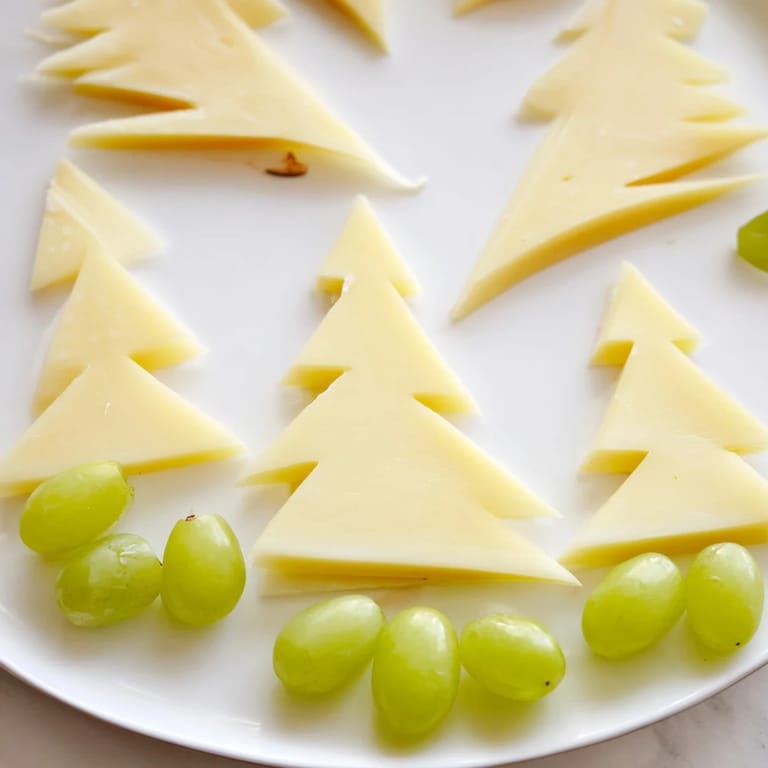
- Build the frame:
- Starting at a corner of your board, arrange the cheese triangles along all four edges with the pointed ends facing outward, like a row of stylized trees standing guard around your display. Let them overlap slightly—this creates visual interest and prevents gaps. Step back occasionally to see how it's looking.
- Tuck in the grapes:
- Now comes the fun part. Nestle those dry green grapes between and around the cheese triangles, filling any empty spaces. They should sit snugly, creating a forest floor effect that ties your tree border together. This is where the magic really happens—the contrast of round grapes against angular cheese is what makes it feel intentional.
- Complete the circle:
- Continue around the entire border until you've created a complete festive frame. Take a moment to adjust pieces if any look out of place. You're not looking for perfection; you're looking for that handmade, thoughtfully-arranged feeling.
- Fill the center:
- Once your border is complete, fill the middle of your board with whatever cheeses, charcuterie, crackers, or fruits you'd like to serve. The beautiful border you've created now frames everything else, making the whole presentation feel elevated and intentional.
 Pin It
 What struck me most about this dish wasn't the compliments on how it looked, but how it changed the atmosphere of our gathering. Suddenly, people were slowing down, taking photos, and actually talking about the food rather than just eating it mindlessly. The board became a centerpiece for connection, which felt like the truest kind of holiday magic.
Making It Your Own
This border design is beautifully forgiving. While I call for green grapes, I've added pomegranate seeds for extra color and festive contrast. I've alternated in red grapes every few pieces for a deeper, more jeweled look. You can even swap the green grapes for small dried cranberries if you want a more autumn feel, or use fresh blueberries if you're working with what's in season. The structure stays the same; only the colors change.
Adding Evergreen Drama
One discovery that elevated this from pretty to stunning was adding fresh rosemary sprigs tucked between some of the cheese triangles. Fresh herbs don't just add another layer of visual interest—they introduce a subtle pine scent that actually makes your display smell like the holidays. If you use fresh herbs, add them just before serving so they stay vibrant and fragrant. You could also try fresh thyme for a more delicate effect, or even small sprigs of fresh dill if you want something unexpected.
The Board Beyond Cheese
I've learned that the power of this presentation lies in what you choose to fill the center. The festive border sets the tone, so you want to complement it thoughtfully. I pair it with aged cheeses, prosciutto, candied nuts, and crusty bread. Holiday-themed crackers add to the spirit. The beautiful border you've created deserves accompaniments that match its intentionality—not just whatever happens to be in the pantry.
- Arrange harder cheeses on one side of the center and softer varieties on the other so guests can pace their flavors
- Add small wooden spreaders or cheese knives so people know these are meant to be savored, not grabbed
- Leave a few empty spaces in the center so the board doesn't feel crowded—negative space is part of the design
 Pin It
 The Tannenbaum Border taught me that holiday entertaining doesn't have to be complicated to feel special. Sometimes the most memorable moments come from taking something simple and presenting it with intention and care.
Recipe Questions & Answers
- → What type of cheese works best for this border?
Semi-firm cheeses like Gouda, Edam, or Emmental work well as they slice easily into triangular shapes and hold form on the board.
- → How should the cheese be cut for the border?
Slice the cheese into thin triangles about 5–6 cm long and 1 cm wide at the base to mimic stylized pine trees.
- → Can I substitute grapes with other fruits?
Small fruits like red grapes or pomegranate seeds can add color contrast and complement the border's appearance.
- → What is the best way to arrange the border on the board?
Place the cheese triangles along all four edges with points facing outward, then nestle grapes between them to create a festive look.
- → How can I enhance the border’s festive feel?
Adding fresh rosemary sprigs can provide a pine needle aroma and boost the holiday theme.