 Pin It
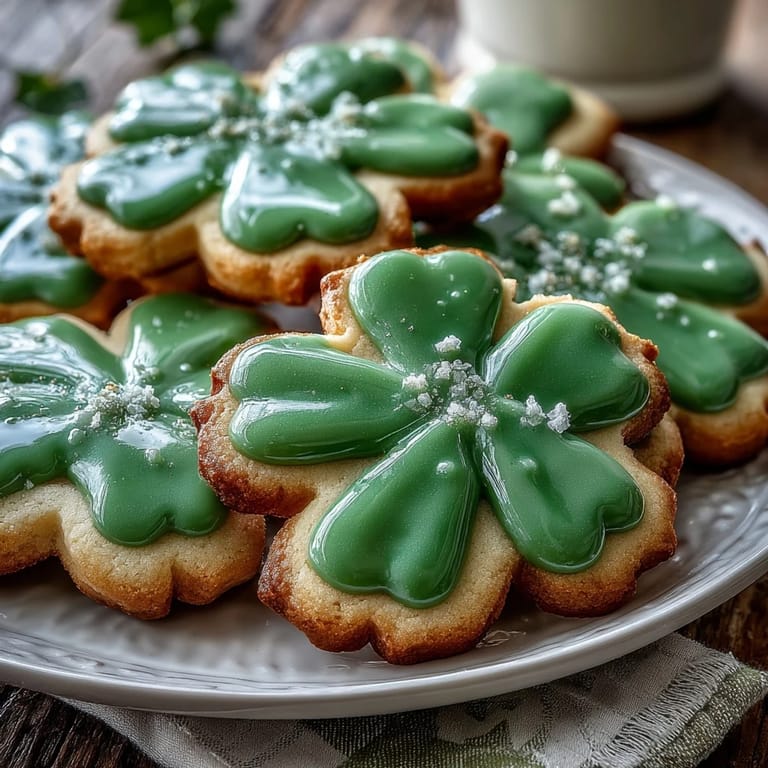
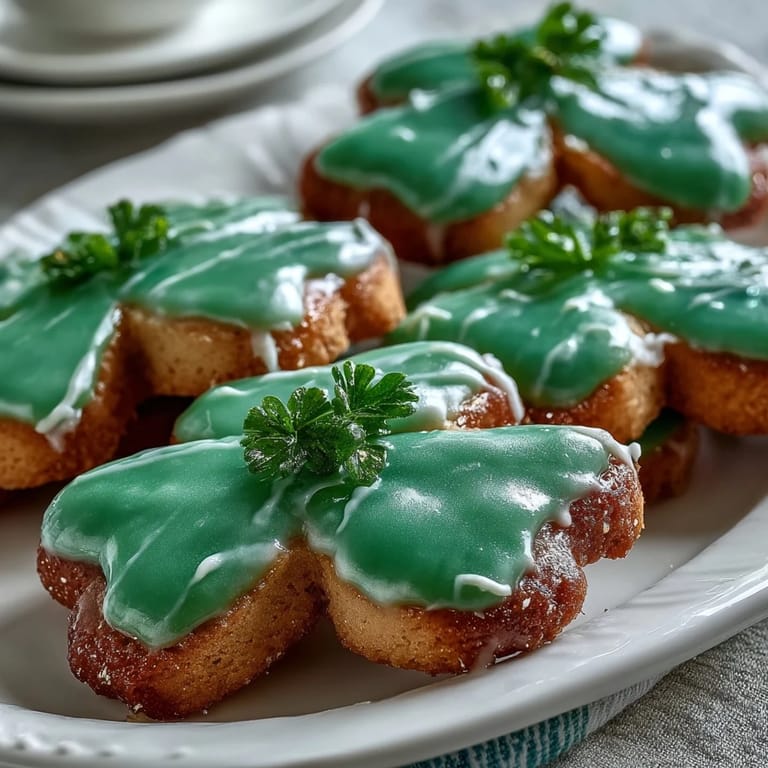
 My kitchen smelled like butter and vanilla the morning my neighbor knocked on the door with a sheepish grin, asking if I could bake something green for her St. Patrick's Day office party. I'd never attempted shamrock cookies before, but something about the request felt like a gentle challenge. That afternoon, as I shaped dough and watched the oven work its magic, I realized these weren't just cookies—they were tiny edible promises of spring and good luck. The royal icing transformed simple butter cookies into something that looked almost too pretty to eat, which made the whole process feel like an act of creative rebellion.
I'll never forget packaging a box of these for my neighbor with a handwritten tag, watching her face light up when she opened it at work. She texted me later that day saying everyone had gathered around her desk just to admire them before eating them, and somehow that felt like the best compliment. It was one of those moments where food became a small bridge between people, connecting us through something beautiful and entirely unnecessary but completely meaningful.
Ingredients
- Unsalted butter, softened (1 cup): The foundation of everything—make sure it's truly soft so it creams easily with the sugar, creating that light, fluffy base that gives these cookies their tender crumb.
- Granulated sugar (1 cup): This sweetens the dough and helps create structure as the cookies bake, striking the perfect balance between sweetness and structure.
- Large egg (1): Acts as a binder and adds richness without making the dough greasy or tough.
- Pure vanilla extract (1½ teaspoons): Vanilla is the secret whisper in these cookies, enhancing the butter flavor without announcing itself.
- Almond extract, optional (½ teaspoon): If you use this, it adds a subtle sophistication that makes people pause and wonder what they're tasting.
- All-purpose flour (2¾ cups): The backbone of your cookie structure—measure carefully by spooning and leveling, not scooping directly from the bag.
- Baking powder (½ teaspoon): Just enough lift to keep these from being dense, but not so much that they spread like pancakes.
- Salt (½ teaspoon): Balances sweetness and deepens the vanilla flavor in ways your taste buds will register but your mind won't quite identify.
- Powdered sugar, sifted (3 cups): For the icing, sifting prevents lumps that would wreck your smooth, glossy finish.
- Meringue powder (2 tablespoons): This is what makes royal icing set hard and shiny instead of staying sticky—it's the difference between a display piece and a mess.
- Warm water (4–5 tablespoons): Add gradually because every kitchen is different and humidity matters more than you'd think.
- Green gel food coloring: Gel holds color intensity better than liquid coloring, which can make icing too thin and murky-looking.
Tired of Takeout? 🥡
Get 10 meals you can make faster than delivery arrives. Seriously.
One email. No spam. Unsubscribe anytime.
Instructions
- Cream your butter and sugar into clouds:
- Beat softened butter with granulated sugar for 2 to 3 minutes until the mixture goes pale and fluffy, like whipped clouds. This creaming step is where the magic starts—you're incorporating air that will help your cookies bake tender, not dense.
- Bring the wet ingredients together:
- Add the egg, vanilla, and almond extract (if using) to your creamed mixture, beating until everything is combined and smooth. Don't worry if it looks slightly curdled at first—a few more seconds of mixing will bring it back together.
- Fold in your dry ingredients gently:
- Whisk flour, baking powder, and salt in a separate bowl, then gradually add to your wet mixture, stirring just until the dough comes together. Overmixing at this stage makes tough cookies, so stop as soon as you don't see streaks of flour anymore.
- Chill your dough patiently:
- Divide dough into two discs, wrap tightly in plastic wrap, and refrigerate for at least 1 hour. This resting time lets the gluten relax and prevents the cookies from spreading too thin in the oven, plus it makes rolling much easier.
- Prepare your baking space:
- Preheat your oven to 350°F and line two baking sheets with parchment paper. This step takes just a minute but prevents burnt bottoms and sticky situations later.
- Roll and cut with intention:
- On a lightly floured surface, roll one dough disc to ¼-inch thickness, then cut out shamrock shapes with a cookie cutter, spacing them about 1 inch apart on your prepared sheets. Work gently so the dough doesn't warm up too much, which would make it sticky and impossible to lift.
- Bake until golden whispers:
- Bake for 8 to 10 minutes, watching for just the slightest golden color at the edges—this is your cue they're done. Cool on the baking sheet for 5 minutes (they're still setting), then transfer to a cooling rack to cool completely before decorating.
- Mix your royal icing until glossy:
- Combine sifted powdered sugar, meringue powder, and vanilla extract in a bowl, then add warm water one tablespoon at a time while beating on low speed until you reach stiff but pipeable peaks. It should look like soft serve ice cream—thick enough to hold its shape but smooth enough to flow through a piping bag.
- Color and decorate with creativity:
- Add green gel food coloring a tiny bit at a time, mixing until you reach your desired shade, then transfer to a piping bag fitted with a small round tip. Outline and flood each cookie with icing, letting it dry completely before adding sprinkles or additional details—this usually takes 2 to 3 hours at room temperature.
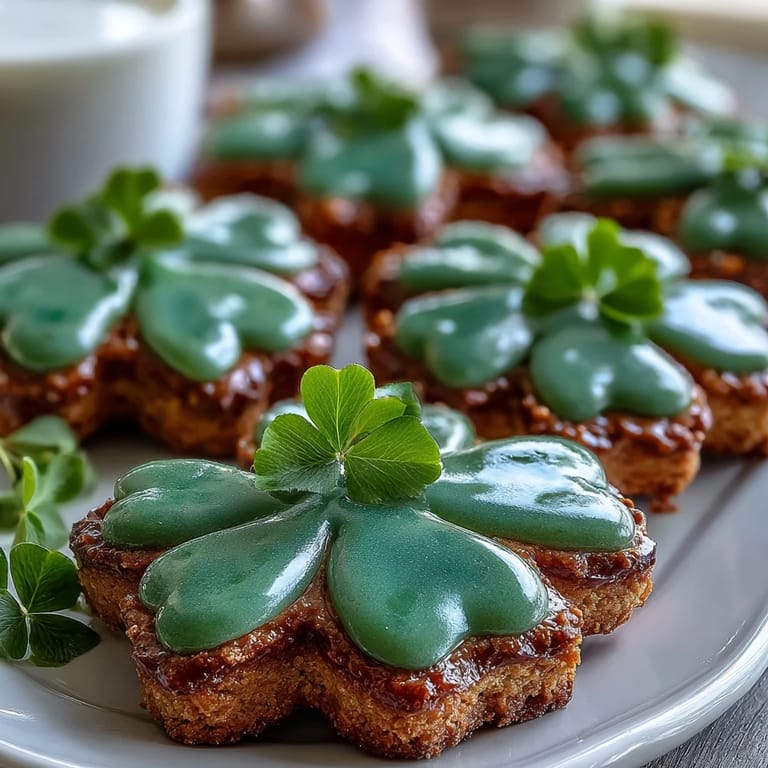
 Pin It
 Watching someone bite into one of these cookies and get that first taste of buttery vanilla with the satisfying crack of set royal icing is a small joy that never gets old. That moment of surprise and delight, especially on a holiday meant for celebrating together, reminds me why baking matters beyond nutrition—it's about making ordinary moments feel special.
Softness Versus Structure
The bake time here is crucial—pull these cookies out at 8 minutes if you like them chewy, closer to 10 if you prefer them snappier. I've learned that the difference between soft and crisp is literally just 2 minutes in a hot oven, and everyone has different preferences, so don't feel locked into a specific time. Trust your eyes more than the timer, watching for that barely-there golden edge that signals the cookies have set but not hardened.
Flavor Variations Worth Trying
While vanilla and butter are the safe, delicious choice, I've experimented with swapping the almond extract for lemon zest or even a tiny bit of orange extract, and both made these cookies feel entirely new. The almond and vanilla pairing is subtle and sophisticated, but if you want something brighter, zest is your friend—it adds flavor without changing the dough's texture or baking time. My personal favorite variation came by accident when I added a pinch of cardamom, which made people ask what the mysterious flavor was but never quite figure it out.
The Art of Icing Like You Mean It
Royal icing looks intimidating until you realize it's just three basic ingredients working together to create something that dries hard and beautiful. The meringue powder is the secret—it stabilizes everything and gives you that glossy finish that looks professional without requiring professional skills. Once you understand that consistency is everything, you'll find yourself making these cookies just for the meditative pleasure of piping icing, watching flat cookies transform into something you want to frame instead of eat.
- Let your icing dry completely before stacking or packaging to prevent cracking or icing transfer.
- If your icing starts drying out as you work, cover the piping bag with a damp towel between cookies to keep it workable.
- Extra icing leftover can be covered and stored in the fridge for up to a week if you want to decorate more cookies later.
 Pin It
 These cookies have become my go-to gift for any St. Patrick's Day gathering, and honestly, I make them other times of year too just because they bring people joy. There's something about homemade cookies that store-bought ones can never replicate, and that difference lives in the butter and the time you spend thinking about the people who'll eat them.