 Pin It
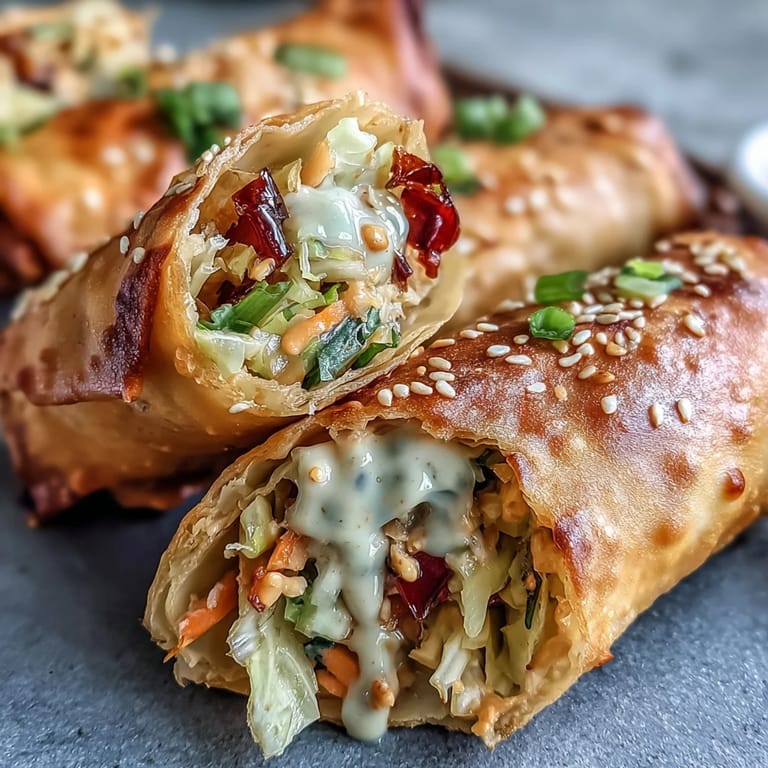
 The sizzle of frying spring rolls is one of those sounds that instantly livens up my kitchen and makes my stomach grumble with anticipation. I first tried my hand at making these after a rainy afternoon spent flipping through cookbooks, craving something crunchy and fresh but not too heavy. There was no grand family tradition—just a quiet curiosity about combining vibrant veggies, slippery noodles, and that craveable golden shell. What surprised me most was how meditative rolling each wrapper became, especially with upbeat music playing in the background. Every time the rolls emerge hot and crisp, they feel like they've brought a little buzz of excitement to the table.
Last summer, I made a double batch for a backyard gathering, and the enthusiasm at the dipping station took me by surprise: friends lined up with plates, debating whether to dunk or drizzle. Even the skeptical cousin, who normally claims to dislike cabbage, sheepishly reached for seconds. It became a scene of happy messiness—sauce on fingers, laughter circling the table, and not a single spring roll left for later. There was something about cooking in flip-flops, music tumbling from a speaker, and the communal joy of crispy bites that made the work feel like play. I still find bits of cilantro in unexpected corners when I think back to that night.
Ingredients
- Spring roll wrappers: These make the signature crispy shell—keep them under a damp towel so they don't dry out while you work.
- Shredded green cabbage: Provides crunch and mild sweetness, but slice it thin for a neater roll.
- Julienned carrots: For color and snap—if rushing, try pre-shredded carrots from the store.
- Bean sprouts: Their juiciness balances the crisp texture; rinse and drain well to avoid soggy rolls.
- Julienned red bell pepper: Adds vibrancy and a gentle tang; make sure strips aren't too thick so the rolls close easily.
- Cooked vermicelli noodles: These give a light chew; make sure they're cool and not sticking together before rolling.
- Green onions: They bring a mellow bite—slice on the diagonal for a fancier touch.
- Fresh cilantro: For a burst of herbal freshness, just don't overdo or it'll overpower the gentle balance.
- Soy sauce: Lends savory depth—low-sodium is fine if you prefer lighter flavor.
- Sesame oil: Just a little delivers toasty aroma, so don't skip it.
- Grated ginger: Be bold here; fresh ginger brightens up every bite.
- Garlic: Minced for even distribution—you can't go wrong with a touch of garlicky warmth.
- Vegetable oil: Neutral and perfect for crisp frying; stick to oils with a high smoke point.
- Creamy peanut butter: It forms the base of the sauce—smooth style works best so you get a velvety dip.
- Rice vinegar: Offers acid to balance the rich peanut flavor; adjust to taste if you like it tangier.
- Honey (or maple syrup): Sweetens the dip and gives shine—maple is perfect for vegan rolls.
- Sriracha (optional): A little heat is wonderful; add more if you're feeling spicy.
- Warm water: This helps thin the sauce to dipping consistency—add gradually to get it just right.
- Toasted sesame oil (for sauce): A drizzle at the end takes the peanut sauce from good to great.
Tired of Takeout? 🥡
Get 10 meals you can make faster than delivery arrives. Seriously.
One email. No spam. Unsubscribe anytime.
Instructions
- Mix the filling:
- Toss the cabbage, carrots, bean sprouts, red pepper, noodles, green onion, cilantro, soy sauce, sesame oil, ginger, and garlic in a large bowl—it should feel vibrant and a little slippery under the spoon.
- Set up your rolling station:
- Lay a spring roll wrapper on a clean surface with a corner facing you, and keep a small bowl of water nearby for sealing edges.
- Fill and roll:
- Spoon a bit of filling near the bottom corner, then fold the corner over the mix, tuck in the sides, and roll up snugly—wet the final edge for a good seal.
- Repeat:
- Keep going until you've used up the filling, stacking rolled spring rolls under a damp towel so they don't dry out.
- Fry until golden:
- Heat two inches of oil in a deep skillet or wok until it shimmers (about 350°F), then fry a few rolls at a time, turning gently, until they're deeply golden and crisp—about three to four minutes.
- Drain:
- Transfer fried rolls to paper towels while you finish up the rest, and try not to eat too many while they're just-cooked warm.
- Make the peanut sauce:
- Whisk peanut butter, soy sauce, rice vinegar, honey (or maple syrup), sriracha, warm water, and sesame oil in a small bowl until creamy and smooth.
- Serve:
- Arrange spring rolls with a bowl of peanut sauce for dunking; garnish with extra herbs or a squeeze of lime if you're feeling fancy.
 Pin It
  Pin It
 There was a night when friends showed up unexpectedly and, with nothing ready, I threw together these spring rolls as a save. Watching them gathered around the counter, happily dipping and crunching, I realized food could make even the most ordinary Thursday night feel festive. Ever since, these have become my default party trick—fast, flexible, and full of color. There's always at least one person who asks for the recipe on their way out. The best part is seeing someone, sauce-streaked smile and all, discover how good homemade rolls can be.
Making Them Your Own
After dozens of batches, I learned spring rolls are endlessly adaptable. Swap in shredded purple cabbage or julienned cucumber for a little extra color and snap, or tuck in a sprinkle of fresh mint for a garden-fresh upgrade. Sometimes I add shiitake mushrooms, sautéed briefly, for an earthy bonus. You can even tuck a sliver of mango if you're feeling adventurous. Each spin lends a new flavor, and that's part of the fun.
Sauce Variations and Swaps
The peanut sauce is a star in its own right, but I've riffed countless times. Almond butter works nicely if peanuts aren't an option, and adding a splash of coconut milk creates a creamy, tropical vibe. If your table loves heat, toss in a dash more sriracha or some finely minced chili. For a tangier twist, a little extra rice vinegar makes the sauce pop. I often keep extra in the fridge for drizzling over salads or grilled veggies later on.
Troubleshooting and Party Prep
I've had rolls split in the fryer, wrappers that stick, and even the occasional forgotten herb (which always feels like a crime). The trick is not to overstuff and to keep everything at room temperature for pliable wrappers. If making ahead, fry just before serving and keep rolls warm in the oven—it’s the only way to guarantee that irresistible crunch stays. And don't forget: batch-frying can take longer than you expect if you crowd the skillet.
- Work with a damp towel over wrappers to avoid drying.
- Fry in small batches for best texture.
- Don’t skip tasting the sauce and adjusting—it’s your secret weapon.
 Pin It
 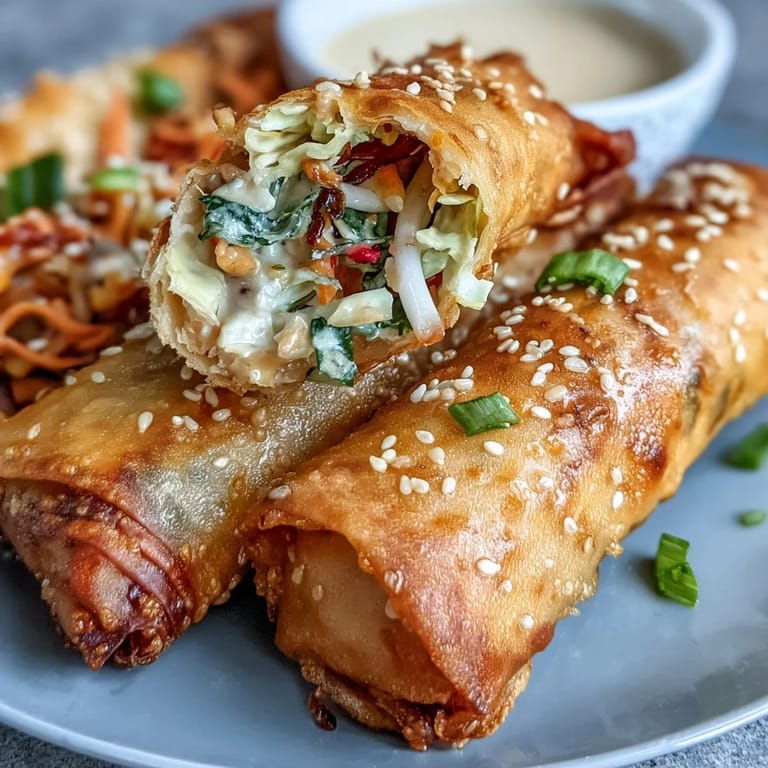 Pin It
 May your first bite be as crisp and satisfying as you hoped. Here's to more laughter, finger-licking, and spring roll nights in your kitchen soon.
Recipe Questions & Answers
- → What oil temperature ensures a crisp exterior?
Heat oil to about 350°F (175°C). Fry in small batches to avoid temperature drops and turn rolls occasionally for even browning; each batch should take roughly 3–4 minutes.
- → How do I prevent soggy rolls when assembling?
Drain and cool any moist ingredients like bean sprouts and noodles before filling. Roll tightly and seal edges with a dab of water; refrigerate assembled rolls briefly to firm them before frying.
- → Can I make a vegan version of the sauce?
Yes. Use maple syrup instead of honey and ensure the peanut butter and soy sauce are free from animal-derived additives. Adjust water to reach a smooth, dip-friendly consistency.
- → How can I bake them for a lighter finish?
Brush rolls with oil and arrange on a parchment-lined sheet. Bake at 400°F (200°C) for 15–18 minutes, turning halfway, until golden and crisp.
- → What thickens the peanut dipping sauce without lumps?
Warm water helps loosen creamy peanut butter smoothly. Whisk the oilier ingredients first with a small amount of warm water, then gradually add more until you reach the desired texture.
- → How should leftovers be stored and reheated?
Cool completely, then store in an airtight container in the fridge up to 2 days. Re-crisp in a hot oven or air fryer for 5–8 minutes rather than microwaving to avoid sogginess.