 Pin It
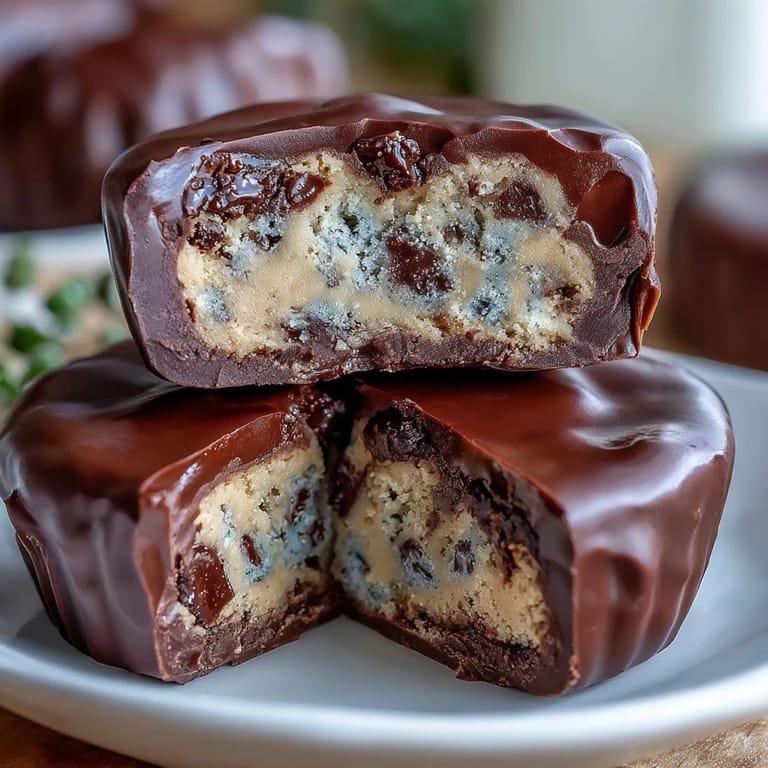
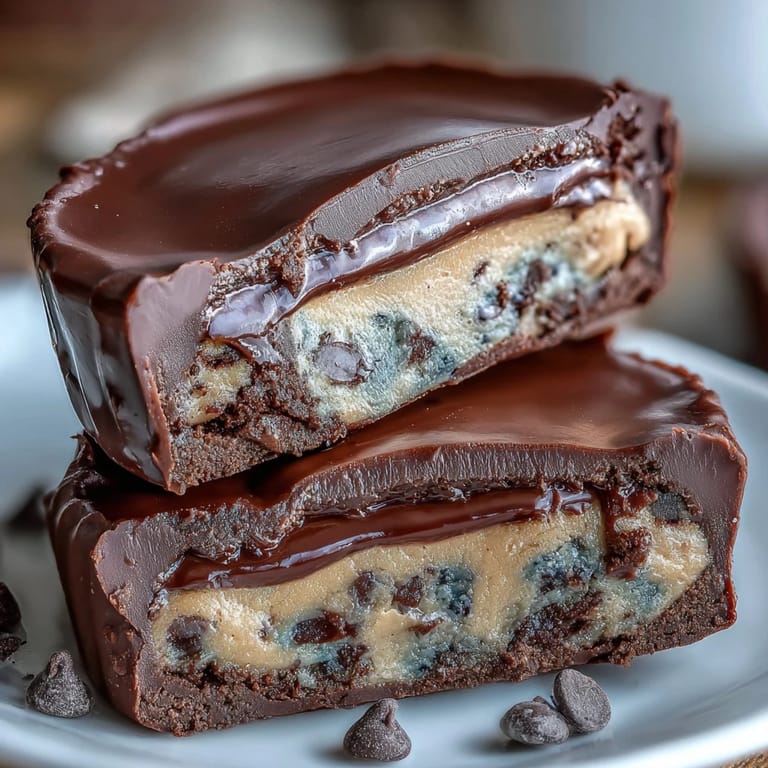
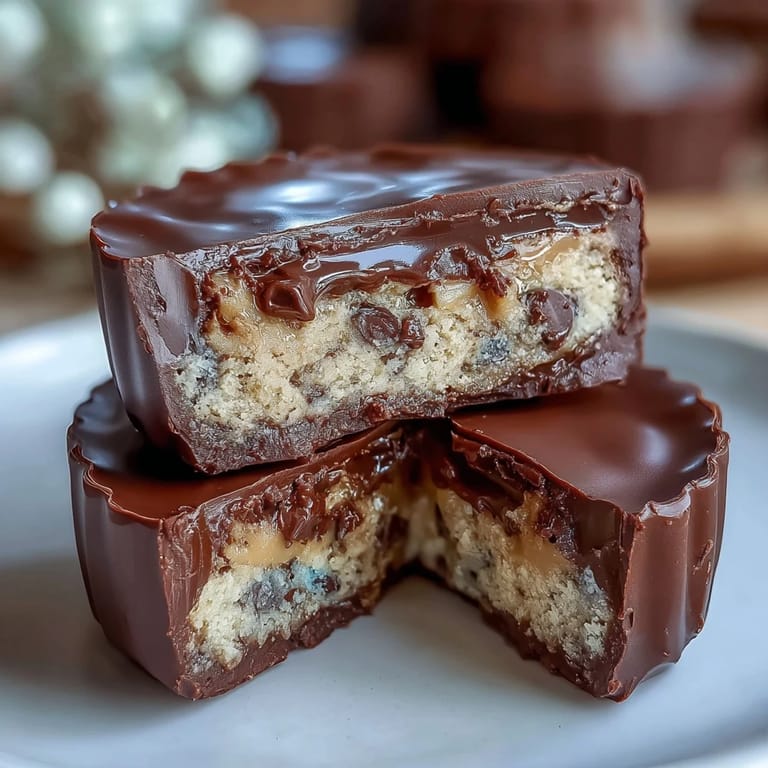
 One Tuesday afternoon, my nephew called asking if I could make him something that tasted like a candy shop dream—specifically, those fancy peanut butter cups but with cookie dough baked right in. I laughed and said I'd figure it out, and three hours later, I was standing in my kitchen covered in melted chocolate, realizing I'd accidentally created something better than store-bought. The combination of eggless cookie dough nestled between rich peanut butter and a chocolate shell somehow felt like cheating, in the best way possible.
I brought a batch to a book club meeting last month, and watching everyone's faces when they bit through that chocolate shell into creamy peanut butter and then hit a pocket of chocolate chip cookie dough was worth every minute of prep. One friend actually closed her eyes and just sat there, which felt like the highest compliment I could get.
Ingredients
- Unsalted butter (1/4 cup for dough, 2 tbsp for peanut butter layer): This is your foundation—use room temperature butter for the cookie dough or it won't cream properly, and melted for the peanut butter layer to help everything bind.
- Light brown sugar and granulated sugar (1/4 cup and 2 tbsp): The combination gives you moisture and depth; if you only use one, the dough either gets too cakey or too gritty.
- Vanilla extract (1/2 tsp): A small amount goes a long way, so don't skip it even though it seems minor.
- Milk (1 tbsp): This keeps the dough tender and prevents it from being too crumbly; almond or oat milk works beautifully for dairy-free versions.
- Heat-treated all-purpose flour (1/2 cup): This is non-negotiable for food safety when eating raw dough—microwave it for one minute with a stir halfway through, or bake at 350°F for five minutes before using.
- Salt (1/4 tsp for dough, pinch for peanut butter): It amplifies the other flavors and balances sweetness; don't leave it out thinking it won't matter.
- Mini chocolate chips (1/3 cup): These distribute better than regular chips and feel less chunky in each bite, but regular chips work if that's what you have.
- Creamy peanut butter (1/2 cup): Natural or conventional both work, but make sure it's not the separated oil kind unless you like a thinner layer.
- Powdered sugar (1/4 cup): This sweetens and thickens the peanut butter layer without adding moisture like granulated sugar would.
- Semisweet or milk chocolate chips (2 cups): Choose based on how sweet you want your cups; dark chocolate is also stunning if you prefer something less sugary.
- Coconut oil or vegetable oil (2 tsp): This thins the chocolate just enough to coat smoothly without making it taste oily—it's the secret to that professional finish.
Tired of Takeout? 🥡
Get 10 meals you can make faster than delivery arrives. Seriously.
One email. No spam. Unsubscribe anytime.
Instructions
- Cream the cookie dough base:
- In a medium bowl, beat softened butter with brown sugar and granulated sugar until the mixture looks pale and fluffy, about two minutes. This aerates the dough and creates a better texture than if you just stirred them together.
- Add wet ingredients and mix:
- Pour in vanilla and milk, stirring until everything is combined and looks smooth. Don't overmix at this point or the dough becomes tough.
- Incorporate flour and salt:
- Gently fold in your heat-treated flour and salt using a spatula or wooden spoon until just combined. The dough should hold together but still feel slightly tender.
- Fold in the chocolate chips:
- Add mini chocolate chips and stir until evenly distributed throughout. Pop the bowl in the fridge while you prepare the chocolate base.
- Line your muffin tin:
- Insert paper liners into all twelve cups of your muffin tin—this prevents sticking and makes the presentation prettier.
- Melt chocolate with oil:
- Combine chocolate chips and coconut oil in a microwave-safe bowl and melt in thirty-second bursts, stirring between each one, until completely smooth and glossy. The oil prevents the chocolate from seizing up.
- Create the chocolate base layer:
- Spoon about one tablespoon of melted chocolate into each lined cup, then gently tilt and tap the pan so the chocolate coats the bottom evenly. You want a thin, even layer that forms a shell.
- Freeze the chocolate base:
- Pop the tin into the freezer for ten minutes—this sets the chocolate so your next layers don't sink through.
- Mix the peanut butter filling:
- While the chocolate sets, stir together creamy peanut butter, melted butter, powdered sugar, and a pinch of salt until the mixture is completely smooth and spreadable. Taste it; this is the flavor you want shining through.
- Layer the peanut butter:
- Remove the muffin tin from the freezer and drop a heaping teaspoon of peanut butter mixture onto each chocolate base. Use the back of a spoon to flatten it slightly, leaving a small margin around the edges.
- Press in the cookie dough:
- Scoop about one teaspoon of chilled cookie dough and gently press it onto the peanut butter layer in each cup. It doesn't have to be perfect; a slightly rustic look actually looks more homemade.
- Top with chocolate seal:
- Spoon enough melted chocolate over each cup to completely cover the fillings, smoothing the tops with the back of the spoon. Work quickly so the chocolate doesn't cool and become difficult to spread.
- Final chill:
- Refrigerate or freeze for at least twenty minutes until the chocolate is completely set and the cups feel firm when gently pressed. You can eat them straight from the fridge or let them sit at room temperature for a softer bite.
 Pin It
 There's something deeply satisfying about biting into one of these and having every layer reveal itself—that snap of the chocolate shell, the creamy peanut butter, then that surprise of cookie dough texture in the middle. My nephew now requests these instead of store-bought candy, which feels like the ultimate kitchen victory.
Flavor Combinations to Try
The base recipe is perfect as-is, but once you nail it, you can start experimenting. Try dark chocolate for a deeper, less sweet experience, or swap the semisweet chips in the cookie dough for white chocolate for something completely different. A tiny pinch of fleur de sel sprinkled on top before the final chocolate sets adds a sophisticated touch that makes people ask what your secret is.
Storage and Make-Ahead Tips
These keep beautifully in an airtight container in the refrigerator for up to two weeks, which means you can make them on Sunday and have a treat ready whenever you need it. They also freeze exceptionally well for up to a month—just let them sit at room temperature for a few minutes before eating so the textures aren't rock-hard. I like keeping a stash in the freezer for unexpected guests because they look fancy but require zero last-minute effort.
Troubleshooting Common Issues
If your chocolate coating cracks or looks bumpy, it usually means the temperature difference between layers was too extreme—try not jumping straight from freezer to room temperature. If the peanut butter layer is too thin or thick, adjust the ratio next time; a heaping teaspoon should create a layer about the thickness of a dime. If the cookie dough tastes bitter, your flour might have burned during heat-treating; go lower temperature or shorter time next time.
- Room temperature chocolate sets smoother than cold chocolate, so let melted chocolate cool for thirty seconds before applying top layers.
- If you don't have mini chocolate chips, regular chips work but will look less refined and can occasionally break through the bottom layer.
- Make sure your peanut butter isn't the natural separated kind, or your layer will be too thin and oily.
 Pin It
 These homemade peanut butter cups prove that the best desserts don't need complicated techniques or fancy equipment—just good ingredients and a little patience. Make a batch this weekend and watch how quickly they disappear.
Recipe Questions & Answers
- → How is the cookie dough made safe to eat without baking?
The flour is heat-treated by microwaving or baking to eliminate any harmful bacteria, allowing safe consumption in raw dough form.
- → Can I use dairy-free alternatives in this treat?
Yes, you can substitute almond or oat milk for regular milk and choose dairy-free chocolate chips to keep it dairy-free.
- → What is the best method to melt the chocolate smoothly?
Melting chocolate in short microwave bursts with occasional stirring or using a double boiler ensures smooth, even melting without burning.
- → How long should the cups be chilled before serving?
Chill the assembled cups for at least 20 minutes in the refrigerator or freezer until the chocolate is fully set.
- → Can I add any toppings to enhance the flavor?
Sprinkling flaky sea salt on top before chilling adds a delightful contrast to the sweet layers.
- → What tools are needed to prepare these treats?
A muffin tin with liners, mixing bowls, an electric mixer, and a microwave-safe bowl or double boiler for melting chocolate are all helpful.