 Pin It
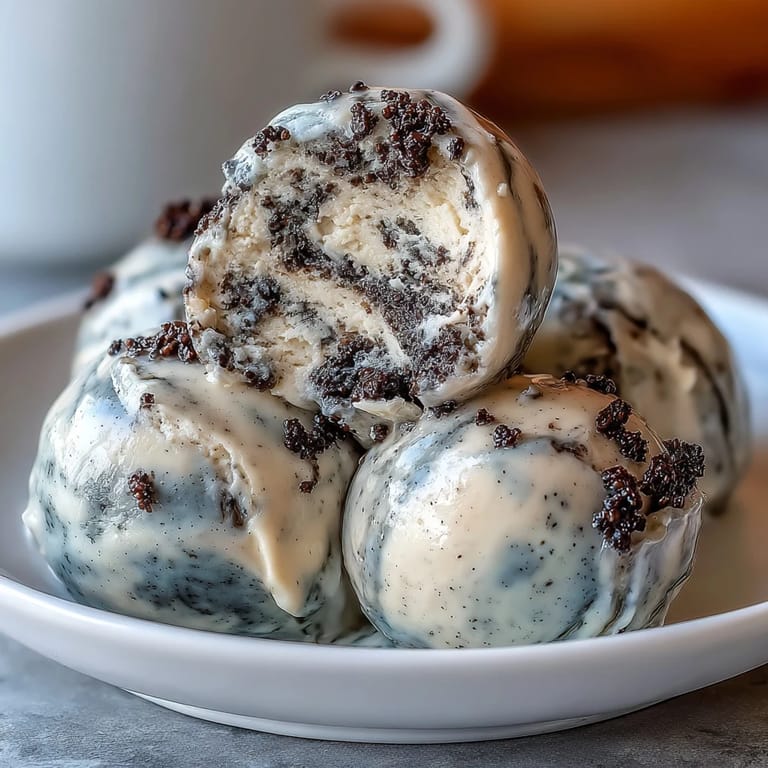
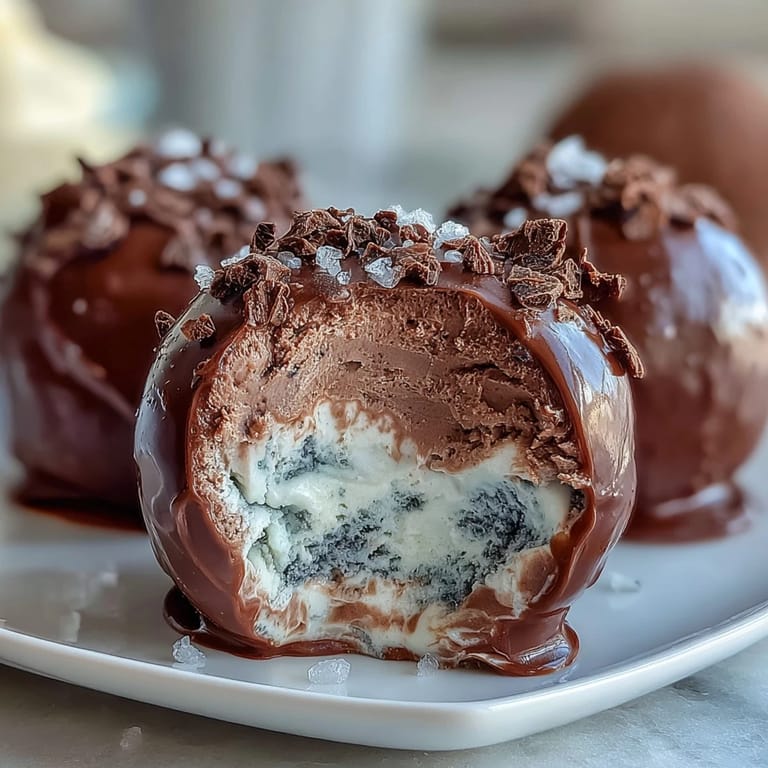
 My first encounter with black sesame mochi ice cream happened on a humid August evening at a tiny dessert shop in Chinatown, and I was immediately struck by the contrast—that cool, creamy center wrapped in something chewy that required an actual effort to bite through. Years later, standing in my kitchen with an ice cream maker humming away, I realized I could recreate that exact moment of surprise and delight whenever I wanted. The nutty depth of black sesame paired with the pillowy mochi shell became my answer to everyone asking what I was bringing to summer gatherings.
I'll never forget watching my neighbor's kids try these for the first time—they were confused at first, then delighted, and suddenly I was fielding requests to make them for birthday parties. There's something about the element of surprise that makes a dessert memorable, and that's exactly what happens when someone bites into that soft mochi and discovers the cold, luxurious ice cream waiting inside.
Ingredients
- Whole milk: Creates the base for your custard and keeps the ice cream creamy without being heavy; don't skip this step of heating it properly, as it's essential for tempering the eggs safely.
- Heavy cream: This is where the richness comes from, so use the good stuff—it makes a noticeable difference in mouthfeel.
- Granulated sugar: You'll use it in both the ice cream and mochi dough, so measure carefully and know that it dissolves differently depending on temperature.
- Large egg yolks: These create the custard's silky texture; tempering them correctly prevents scrambled eggs, which I learned the expensive way early on.
- Black sesame paste: The star ingredient that gives this dessert its distinctive nutty, slightly bitter character—seek out the roasted, unsweetened version from Asian markets for authentic depth.
- Vanilla extract: A small amount brightens the black sesame without competing with it; pure extract tastes noticeably better than imitation.
- Sweet rice flour (mochiko): This glutinous flour is what makes mochi chewy rather than cake-like; regular flour won't work no matter how much you adjust liquid ratios.
- Cornstarch: Your secret weapon for handling sticky mochi dough without it becoming a disaster on your hands and work surface.
- Water: The exact amount matters here since the mochi dough is moisture-sensitive; too much and it's gluey, too little and it cracks when you stretch it.
Tired of Takeout? 🥡
Get 10 meals you can make faster than delivery arrives. Seriously.
One email. No spam. Unsubscribe anytime.
Instructions
- Heat your milk and cream:
- Pour both into a saucepan and watch carefully as they warm over medium heat—you're looking for that moment when tiny bubbles form around the edge and steam just barely rises. Don't walk away; a scorched bottom ruins everything.
- Create your egg mixture:
- Whisk your yolks and sugar together in a bowl until they turn pale and ribbony, which takes about three minutes of actual effort. This lightening process is what prevents scrambled eggs later, so patience here pays dividends.
- Temper the eggs slowly:
- Pour your hot milk mixture into the eggs while whisking constantly—I mean constantly, not just a few stirs. If you rush this, you'll end up with sweet scrambled eggs, which is as disappointing as it sounds.
- Cook your custard to silky perfection:
- Return everything to the saucepan and stir over low heat until the mixture coats the back of a spoon (dip a spoon in, run your finger across the back, and if the line holds, you're done). This custard stage is crucial and typically takes five to seven minutes.
- Add the black sesame magic:
- Whisk in your black sesame paste, vanilla, and salt until absolutely smooth—no lumps hiding in there. The color will shift to a deep charcoal brown, which is your signal that everything is working.
- Chill your custard completely:
- Strain it through a fine mesh sieve into a clean bowl to catch any stray bits of cooked egg, then refrigerate for at least four hours, ideally overnight. This cooling step is non-negotiable for proper ice cream texture.
- Churn with your ice cream maker:
- Follow your machine's specific instructions, but generally you're looking for soft-serve consistency, which means don't overchurn. Transfer to a parchment-lined tray and freeze the scoops until rock solid, at least two hours.
- Microwave your mochi dough:
- Whisk your sweet rice flour, sugar, and water together until completely smooth with no lumps—any dry bits will cause problems. Microwave for two minutes, stir with a wet spatula (it's too hot to touch otherwise), then microwave another minute until it's opaque and definitely sticky.
- Handle the hot mochi:
- Turn it out onto a cornstarch-dusted surface and let it cool just long enough to handle without burning yourself—usually two to three minutes. Work quickly at this stage because mochi is finicky about temperature.
- Shape your mochi rounds:
- Divide the dough into eight pieces and flatten each into a 3.5-inch round, dusting liberally with cornstarch as you go. If it sticks, dust more; if it tears, press it back together gently.
- Wrap with speed and intention:
- Place a frozen ice cream ball in the center of each mochi round and pinch the edges up to seal, working as fast as you can without tearing. Pop each sealed mochi into a muffin tin lined with plastic wrap, seam-side down.
- Final freeze before serving:
- Freeze for at least one hour so the mochi firms up and the ice cream stays properly frozen. This resting time also helps the textures integrate.
 Pin It
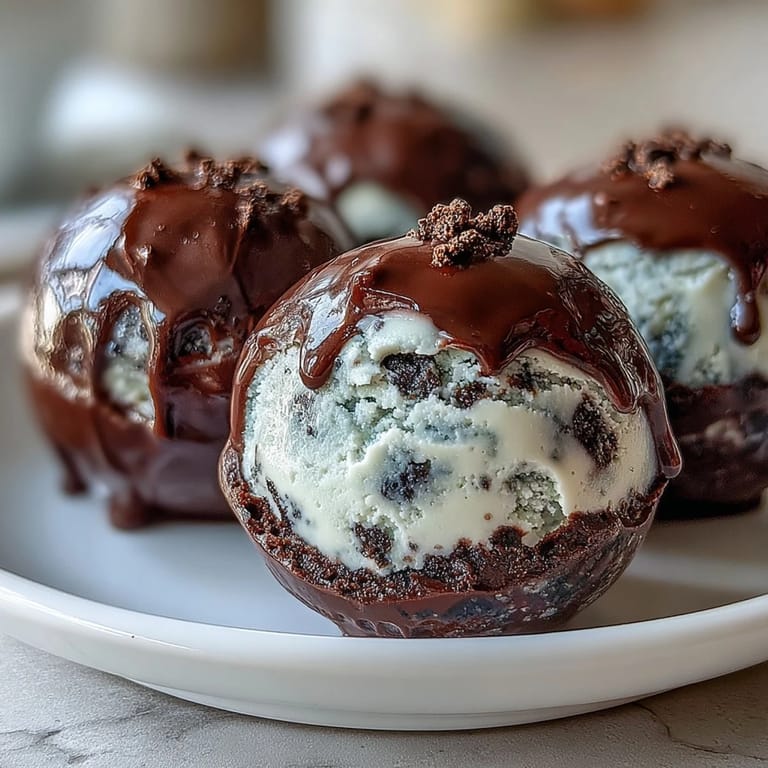
 There was a moment last winter when my daughter asked if we could make these together for her school potluck, and watching her carefully seal each mochi ball while humming to herself, I understood why this dessert matters—it's not just about the flavors, it's about the small ritual of making something with purpose. These little balls became her contribution, and they disappeared before anything else on the table.
The Black Sesame Flavor Profile
Black sesame has this deep, toasted nuttiness that's almost savory in the best way possible, different from the lighter flavor of white sesame seeds you might be familiar with. It's earthy and complex without being bitter if you choose quality paste, and it plays beautifully against the sweetness of the ice cream and mochi. The first time someone tastes this, they often pause trying to identify what they're experiencing, which is exactly the reaction you want from a dessert.
Working with Mochi Dough
Mochi dough is honestly a little temperamental, but once you understand its personality it becomes easier. The microwave method is faster than stovetop and gives you better control—you'll watch it transform from a grainy mixture to a glossy, pillowy dough right before your eyes. The key is respecting that it's sticky by nature, not fighting it with tons of flour, because cornstarch does the job without toughening the final product.
Storage and Make-Ahead Strategy
These mochi ice cream balls are one of those rare desserts that actually improve with a day or two of freezing, as the flavors meld and the texture becomes more unified. You can make the ice cream up to a week ahead and the mochi dough up to a day ahead (keep it wrapped tightly in plastic), then assemble just a few hours before serving. If you're bringing these somewhere, transport them in a cooler with ice packs and they'll stay perfect during even a summer commute.
- Make ice cream first since it needs the longest chilling and churning time.
- Prepare mochi dough the day before or morning of, keeping it wrapped to prevent drying.
- Assemble no more than four hours before serving to maintain the best texture contrast between mochi and ice cream.
 Pin It
 Making black sesame mochi ice cream at home transforms a special-occasion dessert into something you can actually enjoy whenever the craving hits, which has happened more often than I'd care to admit. There's real joy in that moment when someone bites through the chewy mochi and discovers the cold, nutty cream waiting inside, and that's reason enough to master this recipe.
Recipe Questions & Answers
- → How do you prevent mochi from sticking?
Dust surfaces and your hands with cornstarch when handling mochi dough. This reduces stickiness and eases shaping.
- → What is the best way to shape the mochi dough?
Divide the cooled mochi dough into equal portions, flatten each into a thin round before wrapping the ice cream balls quickly to avoid melting.
- → Can I prepare the black sesame ice cream ahead of time?
Yes, churn the custard infused with black sesame paste, freeze into small balls, and keep refrigerated until assembling.
- → What substitutes work for black sesame paste?
Store-bought black sesame spread can be used if homemade paste is unavailable, maintaining the nutty flavor.
- → How long should the wrapped mochi be frozen before serving?
Freeze the filled mochi for at least one hour to ensure a firm texture and proper melding of flavors.
- → Are there any serving suggestions for this dessert?
Pairing the mochi with green tea complements the nutty sesame flavors and balances sweetness.