 Pin It
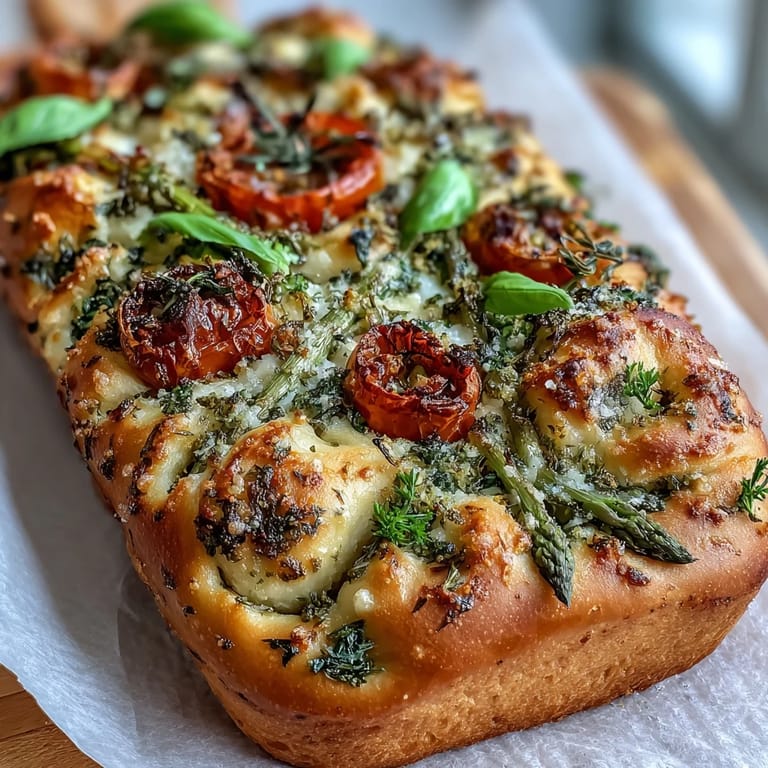
 Imagine a bread that's not just baked, but bloomed—a canvas of golden, herb-kissed focaccia transformed into an edible garden. Baby in Bloom Herb Focaccia with Floral Veggie Art is where Mediterranean breadmaking meets botanical artistry, creating a showstopping centerpiece that celebrates new beginnings, spring gatherings, and the pure joy of cooking with color and creativity. Each dimpled bite carries the warmth of olive oil, the fragrance of fresh herbs, and the vibrant beauty of vegetables arranged like petals and stems across its surface.
Pin It This isn't just focaccia—it's a celebration baked into bread. The dough itself is wonderfully forgiving, enriched with olive oil for a tender crumb and dimpled surface that catches pools of golden oil and herbs. But the magic happens when you begin to compose your edible bouquet: bell pepper rings become flower blooms, asparagus spears form graceful stems, cherry tomatoes add pops of ruby, and fresh herbs bring fragrance and texture. The result is a bread that tastes as incredible as it looks, with every slice revealing layers of herbaceous, savory goodness.
Ingredients
Tired of Takeout? 🥡
Get 10 meals you can make faster than delivery arrives. Seriously.
One email. No spam. Unsubscribe anytime.
- Dough: 500 g (4 cups) bread flour, 2 tsp instant yeast, 2 tsp sugar, 2 tsp fine sea salt, 325 ml (1⅓ cups) lukewarm water, 60 ml (¼ cup) extra-virgin olive oil, plus more for brushing
- Toppings – Floral Veggie Art: 1 red bell pepper, sliced into thin rings; 1 yellow bell pepper, sliced into thin rings; 1 small red onion, thinly sliced; 6–8 cherry tomatoes, halved; 1 small zucchini, thinly sliced; 8–10 asparagus spears, halved lengthwise; 1 carrot, peeled and sliced into thin ribbons; fresh herbs (rosemary, thyme, basil, parsley, chives, dill) for stems, leaves, and garnishing; edible flowers (optional, e.g., pansies, nasturtiums); flaky sea salt, for sprinkling; freshly ground black pepper
Instructions
- Step 1
- In a large bowl, mix bread flour, instant yeast, sugar, and salt. Make a well in the center and pour in lukewarm water and olive oil. Stir until a sticky dough forms.
- Step 2
- Turn the dough onto a lightly floured surface and knead for 8–10 minutes until smooth and elastic. Alternatively, use a stand mixer with a dough hook for 5–7 minutes.
- Step 3
- Place dough in a lightly oiled bowl, cover with a damp cloth, and let rise in a warm spot until doubled in size (1–2 hours).
- Step 4
- Preheat oven to 220°C (425°F). Line a large baking sheet (about 30x40 cm/12x16 in) with parchment paper and drizzle with olive oil.
- Step 5
- Punch down the dough and transfer to the baking sheet. Stretch and press the dough to fit the pan, creating dimples with your fingertips.
- Step 6
- Brush the surface generously with olive oil.
- Step 7
- Arrange vegetables and herbs artistically to create floral patterns (flowers with bell pepper rings and tomatoes, stems with asparagus or chives, leaves with herbs, petals with carrot ribbons or zucchini slices). Add edible flowers if using.
- Step 8
- Sprinkle with flaky sea salt and black pepper.
- Step 9
- Let the decorated dough rest uncovered for 10–15 minutes.
- Step 10
- Bake for 22–25 minutes, or until golden and cooked through. Rotate the pan halfway for even browning.
- Step 11
- Cool on a rack for 10 minutes before slicing and serving.
Zusatztipps für die Zubereitung
For the best rise, ensure your water is lukewarm (not hot) and your yeast is fresh. If your kitchen is cool, place the covered dough in a slightly warmed oven (turned off) or near a sunny window. When stretching the dough into the pan, be patient—let it relax if it springs back. The dimpling is essential: it creates those signature pockets that hold olive oil and toppings. Slice your vegetables as thinly and uniformly as possible using a sharp knife or mandoline for even cooking and beautiful presentation. Don't skip the 10–15 minute rest after decorating; this allows the dough to puff slightly around the toppings for a more integrated bake.
Varianten und Anpassungen
This recipe is endlessly adaptable to your taste and occasion. Swap in seasonal vegetables like roasted beet slices, radish rounds, or baby spinach leaves. For a more savory profile, add pitted olives, capers, or thinly sliced garlic cloves. Infuse your olive oil with lemon zest, crushed garlic, or chili flakes before brushing for extra depth. If you prefer a vegan version, the recipe is already plant-based. For a gluten-free adaptation, substitute with a high-quality gluten-free bread flour blend, though texture may vary. You can also make mini individual focaccias for single servings, adjusting bake time to 15–18 minutes.
Serviervorschläge
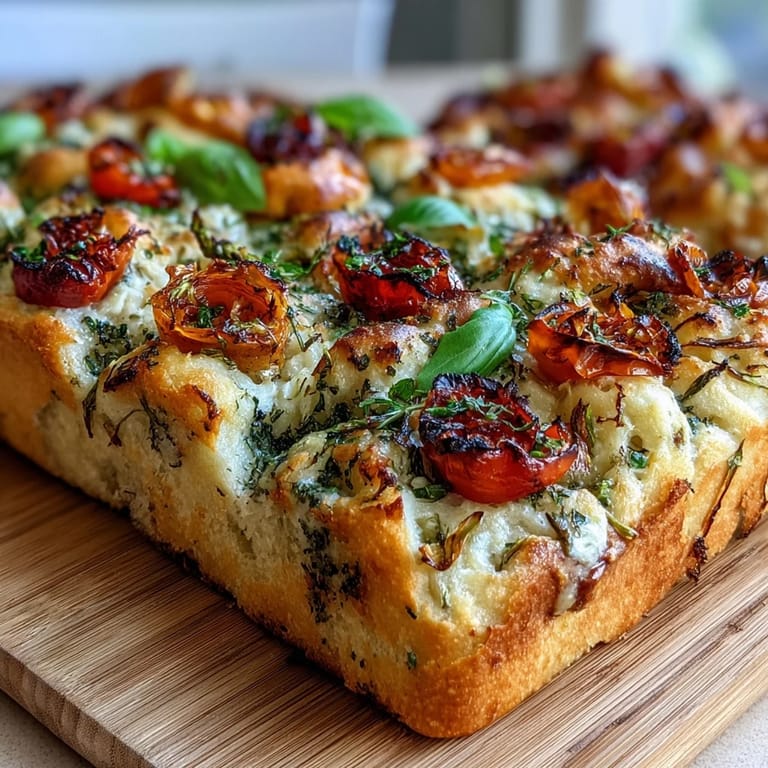
Serve this stunning focaccia as the centerpiece of a spring brunch, baby shower, or garden party buffet. It pairs beautifully with a simple green salad, burrata cheese, or a selection of dips like hummus, baba ganoush, or herbed ricotta. Slice into squares or wedges and arrange on a wooden board for a rustic presentation. For beverages, try sparkling lemonade, iced herbal tea, or a crisp white wine like Pinot Grigio or Sauvignon Blanc. Leftovers (if any!) can be gently reheated in the oven and enjoyed with scrambled eggs or used to make gourmet sandwiches. This bread is best enjoyed the same day while still fresh and fragrant.
 Pin It
 Baby in Bloom Herb Focaccia with Floral Veggie Art is more than a recipe—it's an experience, a conversation starter, and a delicious reminder that food can be both nourishing and beautiful. Whether you're celebrating a new arrival, welcoming spring, or simply want to bring a little extra joy to your table, this focaccia delivers on every level. The combination of fluffy, olive oil-rich bread and vibrant, fresh vegetables creates a harmony of flavor and visual delight that will have everyone asking for the recipe. So gather your herbs, slice your veggies, and let your creativity bloom.
Recipe Questions & Answers
- → How long does the dough need to rise?
Allow the dough to rise in a warm spot until it doubles in size, which typically takes 1 to 2 hours.
- → What vegetables work best for the floral topping?
Thinly sliced bell peppers, cherry tomatoes, zucchini, carrots, asparagus, and sliced red onion create colorful and varied floral designs.
- → Can I prepare the dough ahead of time?
Yes, you can prepare the dough in advance and refrigerate it after the first rise to develop flavor, then shape and decorate before baking.
- → What is the best way to achieve a golden crust?
Brushing the dough generously with olive oil before baking helps create a golden and flavorful crust.
- → Are edible flowers necessary for the decoration?
Edible flowers are optional but add an elegant touch. You can omit them or use seasonal alternatives for decoration.
- → How should leftovers be stored and served?
Store leftovers in an airtight container and reheat briefly in the oven to restore crispness before serving.